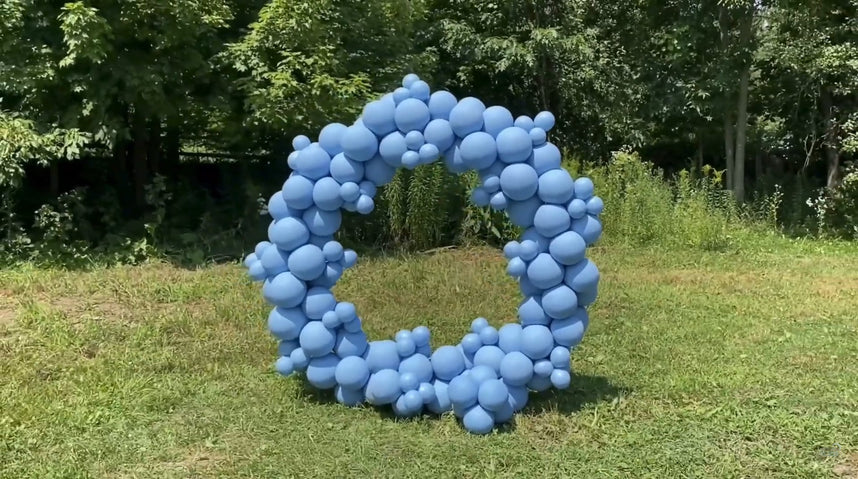
Step-By-Step Guide To Making A Round Balloon Arch

Creating a beautiful blue balloon circle arch is a fun and easy way to add a burst of color to any celebration! Whether it’s for a birthday party, baby shower, or even a whimsical wedding, this stylish decor piece is bound to catch everyone’s eye. The best part? It’s not as complicated as it looks! With just a few key materials and some time, you’ll have your very own balloon arch that looks professional and party-ready. Ready to roll up your sleeves and dive into this DIY adventure? Let’s get started!
Featured Products:
5ft Gold Metal Circle Backdrop StandPink Dual Nozzle Electric Balloon Inflator
Matte Pastel Light Blue Balloons
Step 1: Set Up Your Backdrop Stand

Begin by assembling the 5ft gold metal circle backdrop stand. Follow the provided instructions to make sure each part is securely connected. Once you’ve got the frame set up, position it in the spot you want to display your arch. For extra stability, placing it near a wall can provide additional support.
Step 2: Inflate Your Light Blue Balloons

Next, plug in your pink dual-nozzle electric balloon inflator and start blowing up your matte pastel light blue balloons. Inflate them to a variety of sizes—some large, some medium, and a few smaller ones. This will add depth and dimension to your arch, making it look fuller and more visually interesting.
Step 3: Create Balloon Clusters

After your balloons are ready, start grouping them together into clusters of about 3 to 5 balloons. Make sure each cluster has a mix of sizes to create a balanced and appealing look. Use balloon string, zip ties, or just knot the balloons together to secure the clusters.
Step 4: Attach the Clusters to the Circle Stand

Now comes the fun part! Begin attaching the clusters to your circle stand by twisting them around the arch. Start at the base and work your way up the frame, alternating the placement of larger and smaller clusters for a fuller, more dynamic appearance. Remember to leave some spaces for smaller balloons you’ll add later to fill in any gaps.
Step 5: Fill in the Gaps with Smaller Balloons

Once you’ve secured your main balloon clusters, take a step back and look for any gaps or spaces. Use the smaller balloons to fill in these areas, attaching them with glue dots or double-sided tape to ensure they stay in place. This will help your arch look complete and give it a professional finish.
And that’s it—you’ve created a gorgeous blue balloon circle arch that will wow your guests! Whether it’s for a special event or just to add a fun touch to a gathering, this DIY project is sure to make a statement. Don’t forget to shop for all your balloon decor needs at TableclothsFactory, and be sure to check out our blog for even more creative ideas and tips to elevate your party decor!
